
Introduction
There are days when a simple baking project feels like the right way to slow down for a little while. Mixing a familiar cookie dough and watching it come together is a dependable kitchen routine that fits just as well on a quiet afternoon as it does before a family gathering. These Crispy and Chewy Chocolate Chip Cookies bring together crisp edges and soft centers in a straightforward recipe that’s easy to return to whenever you’re ready to bake.
Why You’ll Love This Recipe Crispy and Chewy Chocolate Chip Cookies
These Crispy and Chewy Chocolate Chip Cookies are simple to prepare with everyday pantry ingredients and a clear mixing method. The combination of brown sugar and granulated sugar creates balanced sweetness, while the chocolate chips are spread throughout every bite. Whether you’re baking for the weekend, sharing with family, or keeping a batch on hand for snacks, this recipe is dependable, practical, and easy to make again whenever the craving returns.
Kitchen Tools You’ll Need
- Stand mixer
- Large mixing bowl
- Medium mixing bowl
- Measuring cups or kitchen scale
- Measuring spoons
- Whisk
- Silicone spatula
- Baking sheets
- Parchment paper
- Wire cooling rack
Ingredients
- 225 g unsalted butter, softened (creates a smooth, creamy base)
- 200 g light brown sugar, packed (adds moisture and richness)
- 100 g granulated white sugar (helps create crisp edges)
- 2 large eggs, room temperature (helps bind the dough)
- 5 ml vanilla extract (adds gentle flavor)
- 325 g all-purpose flour (provides structure)
- 5 g baking soda (supports spreading and lift)
- 3 g fine sea salt (balances sweetness)
- 340 g semi-sweet chocolate chips (adds chocolate throughout)
How to Make Crispy and Chewy Chocolate Chip Cookies
Step 1. Begin by preheating the oven to 190 degrees Celsius and preparing two large baking sheets with parchment paper. Starting with a fully heated oven helps the cookies bake consistently from the moment they go in. Lining the baking sheets keeps the cookies from sticking and makes cleanup much easier. Once everything is prepared, you’ll have a smooth baking process without needing to pause between steps.
Step 2. Place the softened butter, packed light brown sugar, and granulated white sugar into the bowl of a stand mixer. Beat them on medium-high speed for about 3 minutes until the mixture looks noticeably lighter in color and has a fluffy texture. Proper creaming creates a smooth, even mixture without visible butter pieces, giving the dough a uniform consistency before the remaining ingredients are added.
Step 3. Reduce the mixer speed before adding the eggs one at a time. Allow each egg to become fully mixed into the butter mixture before adding the next one. Pour in the vanilla extract and continue mixing until everything is evenly combined. The finished mixture should appear smooth and cohesive, without streaks of egg remaining, creating a stable base for the dry ingredients.
Step 4. In a separate bowl, whisk together the all-purpose flour, baking soda, and fine sea salt. Whisking distributes the baking soda and salt evenly throughout the flour so they blend consistently into the dough. The dry mixture should appear uniform in color with no visible pockets of baking soda or salt before it is added to the wet ingredients.
Step 5. Gradually add the flour mixture to the butter mixture while mixing on low speed. Continue only until the last streaks of flour disappear into the dough. Avoid continuing beyond this point since the instruction is simply to combine everything evenly. The finished dough should look soft and uniform, with no dry flour remaining around the sides or bottom of the bowl.
Step 6. Add the semi-sweet chocolate chips and gently fold them into the dough using a silicone spatula. Folding by hand helps distribute the chocolate chips throughout the mixture without overworking the dough. Continue folding until the chocolate chips appear evenly spread, making sure each portion of dough will contain a good balance of cookie dough and chocolate.
Step 7. Portion the finished dough into 30-gram spheres and arrange them on the prepared baking sheets, leaving about 5 centimeters of space between each one. Keeping the portions consistent encourages even baking, while the spacing allows room for the cookies to spread naturally as they bake without touching each other.
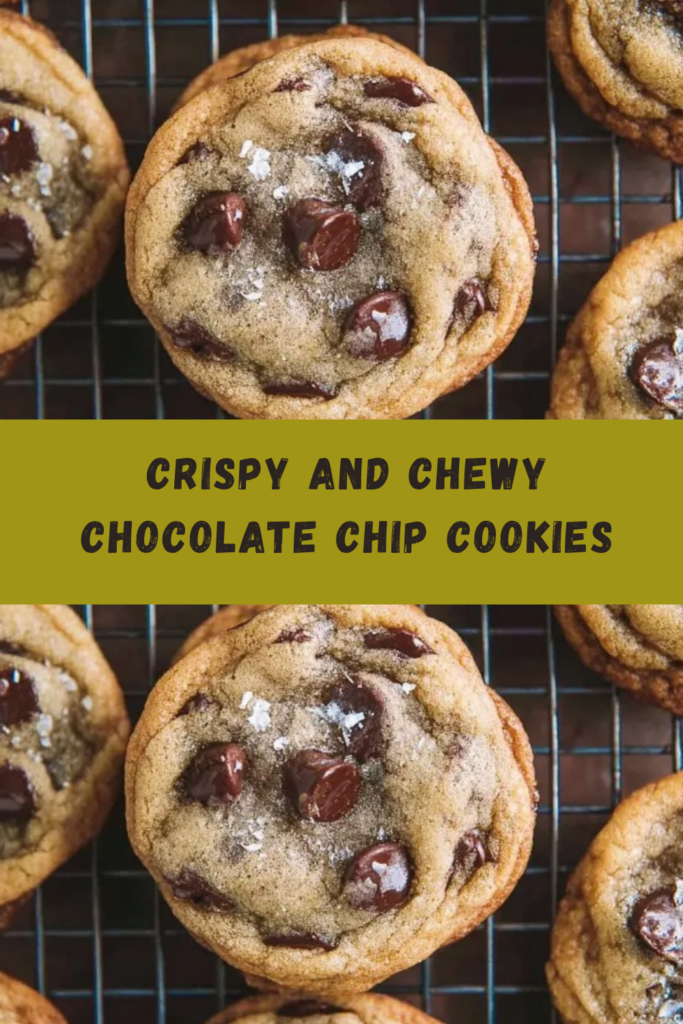
Step 8. Bake the cookies for 10 to 12 minutes. Watch for the edges to become firm and golden brown while the centers remain slightly pale. This visual contrast signals that the cookies are ready to come out of the oven. The centers will continue to settle after baking, helping create the combination of crisp edges and chewy middles described by the recipe.
Step 9. Leave the cookies on the baking sheet for 5 minutes before moving them to a wire rack. This short cooling period allows the structure to set, making the cookies easier to transfer without breaking. Afterward, place them on the wire rack so they can cool evenly while maintaining their crisp exterior and chewy interior.
Serving Suggestions
These cookies fit naturally into many everyday occasions. Enjoy them as an afternoon snack with a cup of coffee or tea, or serve them after dinner as a simple dessert. They’re also easy to bring to weekend gatherings, school events, or casual visits with friends. Once cooled, they travel well in a container, making them convenient for sharing. Leftover cookies can be packed into lunch boxes or enjoyed as a quick treat during the day. Their crisp edges and soft centers make them just as enjoyable a day later, making this recipe a practical choice whenever you want a homemade batch ready to enjoy.
Pro Tips for Best Results
- Use softened butter so it creams smoothly with the sugars.
- Let each egg mix in fully before adding the next one.
- Mix the flour only until no dry streaks remain.
- Fold the chocolate chips in gently.
- Keep the dough portions close to the same size.
- Watch for golden edges with slightly pale centers.
- Allow the cookies to cool on the baking sheet before moving them.
Common Mistakes to Avoid
1. Using butter that isn’t properly softened. Butter that is too firm does not cream smoothly with the sugars, while overly melted butter changes the texture of the mixture. Softened butter blends evenly and creates the light, fluffy consistency described in the instructions. Taking a moment to use butter at the proper consistency helps every later step come together more smoothly.
2. Rushing the creaming step. The recipe calls for beating the butter and sugars until they become light and fluffy. Stopping too early leaves the mixture denser and less uniform. Watching for the lighter color and fluffy appearance is a better guide than simply rushing through the step, giving the dough a well-mixed foundation.
3. Adding both eggs at once. Mixing the eggs in one at a time allows each one to become fully incorporated before the next is added. Pouring them in together can make it harder to achieve the smooth consistency described in the instructions. A gradual approach creates an even mixture before the dry ingredients are introduced.
4. Continuing to mix after the flour disappears. Once the last streaks of flour are gone, the dough is ready for the next step. Continuing to mix isn’t necessary and moves beyond what the recipe calls for. Keeping the mixing brief helps maintain the intended dough consistency before folding in the chocolate chips.
5. Placing dough portions too close together. The instructions specify leaving about 5 centimeters between each dough ball. Crowding the baking sheet limits the space available as the cookies spread during baking. Giving each cookie enough room encourages even baking and helps them keep their individual shape.
6. Moving the cookies immediately after baking. Fresh cookies are still delicate when they first come out of the oven. The recipe includes a short cooling period on the baking sheet so the structure can set. Skipping this step makes them more likely to break during transfer. Waiting the full cooling time makes handling much easier.
Variations & Substitutions
This recipe is designed around semi-sweet chocolate chips, which provide chocolate in every bite. You can make the cookies slightly larger or smaller by adjusting the dough portions while keeping them evenly sized. For consistent results, keep the ingredient list and mixing method the same as written.
Storage & Reheating
Allow the cookies to cool completely before storing them. They can be kept at room temperature in a covered container for several days. For longer storage, place them in the refrigerator in a sealed container. If you’d like to keep them even longer, freeze the cooled cookies in a freezer-safe container or bag. To enjoy them again, let them come to room temperature naturally or warm them briefly until they reach your preferred serving temperature while preserving their texture.
Nutrition Information
Per Serving (1 cookie, approximately 30 g)
These values are estimates and may vary depending on the specific brands of ingredients used and the final number of cookies produced.
- Calories: 145
- Total Fat: 7 g
- Saturated Fat: 4 g
- Carbohydrates: 19 g
- Fiber: 1 g
- Sugar: 19 g
- Protein: 2 g
- Sodium: 6 mg
Frequently Asked Questions
Can I make this recipe ahead of time?
Yes. The dough can be prepared by following all of the recipe steps before baking. When you’re ready, portion and bake according to the original instructions. This can make baking feel more manageable when preparing for a gathering or planning ahead for the week.
How long does it last in the fridge?
Once the cookies have cooled completely, they can be stored in a sealed container in the refrigerator for several days. Keeping them covered helps maintain their texture. Let them come closer to room temperature or warm them gently before serving if you prefer a softer center.
Can I freeze this recipe?
Yes. After the cookies have cooled completely, place them in a freezer-safe container or freezer bag. Freezing works well for extending storage while keeping homemade cookies available for another day. Allow them to thaw naturally before serving or warm them gently if desired.
What can I substitute for one ingredient?
This recipe has been written around the specific ingredients listed, so substitutions are not included. For the most consistent texture and flavor, it’s best to prepare the cookies using the ingredients exactly as provided in the recipe.
Why didn’t my recipe turn out as expected?
Small differences often come from the mixing process or baking stage. Be sure the butter is softened, the eggs are fully incorporated one at a time, the flour is mixed only until combined, and the cookies are removed when the edges are golden while the centers remain slightly pale. Following each step closely helps achieve the intended texture.
Final Thoughts
These Crispy and Chewy Chocolate Chip Cookies are the kind of recipe that fits comfortably into everyday baking. The ingredient list is familiar, the steps are straightforward, and the process moves naturally from mixing to baking without unnecessary complexity. Paying attention to the visual cues throughout the recipe helps create cookies with crisp edges and soft centers. Whether they’re enjoyed fresh from the cooling rack or saved for later in the week, this is a practical homemade recipe that’s easy to return to whenever a fresh batch of cookies sounds like the right choice.

Crispy and Chewy Chocolate Chip Cookies
Equipment
- Stand Mixer
- Large Mixing Bowl
- Medium mixing bowl
- Measuring cups or kitchen scale
- Measuring Spoons
- Whisk
- Silicone spatula
- Baking Sheets
- Parchment Paper
- Wire Cooling Rack
Ingredients
Cookie Dough
- 225 g unsalted butter softened
- 200 g light brown sugar packed
- 100 g granulated white sugar
- 2 large eggs room temperature
- 5 ml vanilla extract
- 325 g all-purpose flour
- 5 g baking soda
- 3 g fine sea salt
- 340 g semi-sweet chocolate chips
Instructions
- Preheat the oven to 190°C (375°F). Line two large baking sheets with parchment paper.
- In the bowl of a stand mixer, beat the softened butter, brown sugar, and granulated sugar on medium-high speed for about 3 minutes until light and fluffy.
- Add the eggs one at a time, mixing well after each addition. Stir in the vanilla extract until fully combined.
- In a separate bowl, whisk together the flour, baking soda, and sea salt.
- Gradually add the dry ingredients to the wet ingredients while mixing on low speed until no dry flour remains.
- Fold in the semi-sweet chocolate chips using a silicone spatula until evenly distributed.
- Scoop the dough into 30 g portions and place them on the prepared baking sheets, leaving about 5 cm (2 inches) between each cookie.
- Bake for 10 to 12 minutes, until the edges are golden brown while the centers remain slightly pale.
- Allow the cookies to cool on the baking sheet for 5 minutes before transferring them to a wire rack to cool completely.